How to light a garden path is a question many homeowners ponder, seeking to transform their outdoor spaces into inviting havens. A well-lit path not only enhances safety and security but also adds a touch of charm and elegance to any landscape.
This guide will delve into the world of garden path lighting, exploring various types, planning techniques, installation tips, and creative ways to illuminate your outdoor oasis.
Whether you envision a romantic glow for evening strolls or a practical guide for nighttime navigation, the right lighting can truly elevate your garden path. We’ll cover everything from choosing the perfect fixtures to designing a layout that complements your landscape and enhances its beauty.
Join us as we illuminate the path to a stunning outdoor experience.
Choosing the Right Lighting
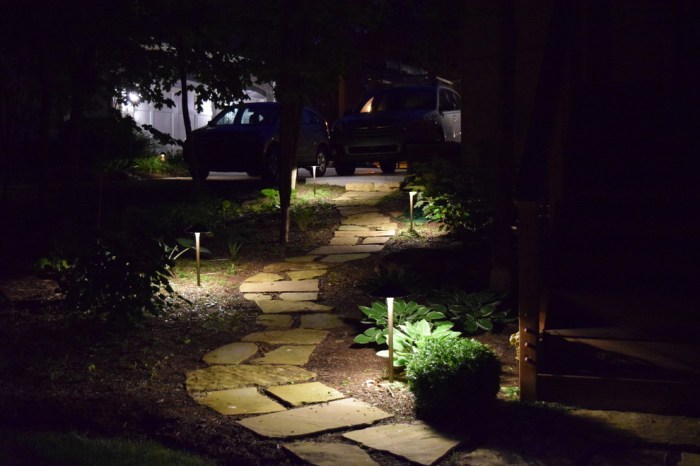
Illuminating your garden path with the right lighting is crucial for both safety and aesthetics. The type of lighting you choose will significantly impact the overall look and feel of your outdoor space, while also influencing factors like energy efficiency and longevity.
Types of Outdoor Lighting for Garden Paths
Choosing the right type of lighting for your garden path involves considering various factors, including energy efficiency, brightness, lifespan, and aesthetic appeal. Here are some popular options:
- Solar-powered lightsharness energy from the sun during the day to power LED bulbs at night. They are eco-friendly, cost-effective, and require no wiring, making them ideal for remote areas.
- LED lightsare highly energy-efficient, long-lasting, and come in various colors and brightness levels. They are a popular choice for outdoor lighting due to their low energy consumption and extended lifespan.
- Traditional incandescent bulbsare still widely available but are less energy-efficient and have a shorter lifespan compared to LED or solar-powered alternatives. They emit a warm, inviting glow, which may be preferred for a more traditional aesthetic.
Pros and Cons of Different Lighting Types
| Lighting Type | Pros | Cons |
|---|---|---|
| Solar-powered lights |
|
|
| LED lights |
|
|
| Traditional incandescent bulbs |
|
|
Examples of Lighting Fixtures for Garden Paths
Choosing the right lighting fixture is essential for creating the desired ambiance and functionality for your garden path.
- Path lightsare small, low-profile fixtures designed to illuminate pathways. They are typically installed along the edges of the path, providing a gentle, even light.
- Bollardsare sturdy, cylindrical fixtures often used for decorative purposes and safety. They are typically taller than path lights and can be used to define areas or highlight specific features.
- Lanternsoffer a classic, traditional look and can be used to create a romantic or whimsical ambiance. They are available in various styles and sizes, from small, portable lanterns to large, stationary fixtures.
- String lightsprovide a warm, inviting glow and can be used to create a festive atmosphere. They can be strung along fences, trees, or trellises, or hung overhead for a more dramatic effect.
Installing the Lights

Installing garden path lights is a relatively straightforward process that can be accomplished with basic tools and a little patience. The installation process will vary slightly depending on the type of lighting you choose, but the general principles remain the same.
When lighting a garden path, consider the overall aesthetic you want to achieve. You can create a warm and inviting ambiance with string lights or lanterns, or opt for a more modern look with LED path lights. A gazebo can enhance the atmosphere, especially when strategically placed, as outlined in this article on where to place a gazebo.
Ultimately, the placement of your gazebo will influence the lighting needs of the path, so ensure both elements complement each other.
Installing Solar Lights
Solar lights are a popular choice for garden path lighting due to their ease of installation and low maintenance requirements. They harness energy from the sun during the day and automatically illuminate your path at night.
- Choose the Right Location:Solar lights require direct sunlight to charge properly. Select a location where the lights will receive at least 6 hours of sunlight each day. Avoid placing them under trees or other obstructions that might block sunlight.
- Prepare the Ground:Using a shovel or garden trowel, dig a hole that is slightly larger than the base of the solar light. The depth should be sufficient to allow the light to stand upright and stable.
- Insert the Light:Carefully place the solar light into the hole and ensure it is level. Backfill the hole with soil, gently tamping it down around the base of the light to secure it in place.
- Adjust the Angle:Once the light is installed, adjust the angle of the solar panel to maximize sunlight exposure. The panel should be facing directly towards the sun.
- Turn on the Light:Most solar lights have a switch that needs to be turned on before they will illuminate at night. Locate the switch and ensure it is in the “on” position.
Installing Hardwired Lights
Hardwired lights require a direct connection to your home’s electrical system and offer more consistent illumination than solar lights.
- Plan the Layout:Before you begin installation, create a detailed plan of your garden path lighting layout. Determine the location of each light fixture and the path of the electrical wiring.
- Gather the Necessary Materials:You will need a variety of tools and materials for installing hardwired lights, including:
- Wire strippers
- Wire cutters
- Electrical tape
- Voltage tester
- Circuit breaker
- Light fixtures
- Electrical wire (appropriate gauge and type)
- Junction boxes
- Ground fault circuit interrupter (GFCI) outlet
- Run the Wiring:Using your planned layout as a guide, carefully run the electrical wire along the path. You may need to bury the wire underground or attach it to existing structures. If burying the wire, use a wire locator to ensure it is buried at a safe depth.
Illuminating your garden path with strategically placed lights can create a beautiful and welcoming ambiance. When choosing the right fixtures, consider the overall aesthetic and safety of your space. If you’re planning to install the lighting yourself, be mindful of the power tool noise rules in your area, especially if working during the day.
With proper planning and execution, you can transform your garden path into a stunning focal point, enhancing both its functionality and visual appeal.
- Connect the Lights:Connect the electrical wire to the light fixtures using wire strippers and electrical tape. Ensure that the wires are properly connected to the correct terminals and that the connections are secure.
- Test the Installation:Before you cover the wiring or install the light fixtures, test the installation using a voltage tester. Ensure that the lights are working properly and that there are no short circuits.
Installing Stake Lights
Stake lights are a simple and versatile option for garden path lighting. They are typically solar powered and can be easily inserted into the ground.
- Select the Right Stake Lights:Choose stake lights that are appropriate for the size and shape of your garden path. Consider the height of the light and the angle of the light beam.
- Locate the Installation Spots:Determine the best locations for the stake lights along your garden path. Spacing should be consistent and allow for adequate illumination.
- Insert the Lights:Using a hammer or mallet, carefully drive the stakes into the ground. Ensure that the lights are installed at a level and stable angle.
- Turn on the Lights:Most stake lights have a switch that needs to be turned on before they will illuminate at night. Locate the switch and ensure it is in the “on” position.
Creating Ambiance and Safety
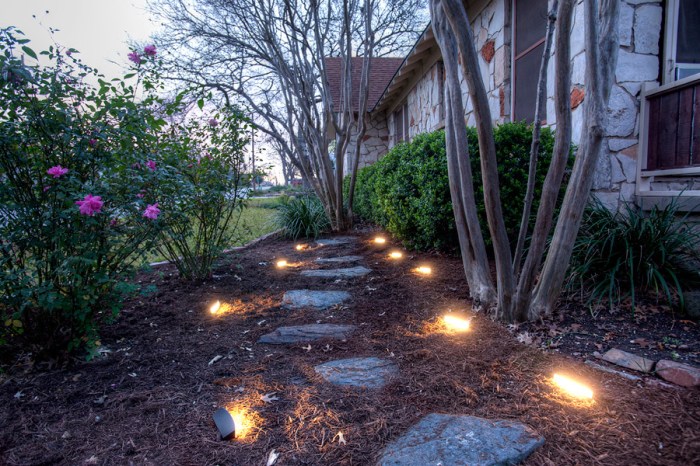
Beyond simply illuminating the path, garden lighting can transform your outdoor space into a captivating nighttime oasis. By strategically placing lights, you can create a mesmerizing ambiance, enhance safety, and highlight the unique features of your garden.
Creating a Welcoming Atmosphere, How to light a garden path
Lighting plays a crucial role in setting the mood for your garden path. By carefully selecting light sources and their placement, you can create a warm and inviting atmosphere that encourages relaxation and enjoyment.
- Warm White Light:Opt for warm white bulbs to create a cozy and inviting atmosphere. This type of lighting is perfect for creating a romantic ambiance or a relaxing retreat.
- Dimmable Lights:Consider using dimmable lights to adjust the brightness level based on the desired mood. This allows you to create a soft, intimate glow for a romantic evening or a brighter light for a more social gathering.
- Lanterns and String Lights:Lanterns and string lights add a touch of whimsy and charm to any garden path. They create a warm, inviting glow that can transform your outdoor space into a magical setting.
Highlighting Garden Features
Garden lighting can be used to highlight specific features and add visual interest to your landscape. This can be achieved by strategically placing lights to create dramatic shadows and contrasts, drawing attention to the beauty of your garden.
- Uplighting:Uplighting is a technique that uses light to illuminate objects from below, creating a dramatic effect. This can be used to highlight trees, sculptures, or other architectural features.
- Downlighting:Downlighting directs light downwards, providing a soft and diffused glow. This is ideal for illuminating pathways, walkways, and areas where you want to create a sense of security.
- Accent Lighting:Accent lighting is used to highlight specific features, such as a flower bed, a water feature, or a piece of garden art. This can be achieved using spotlights, wall sconces, or other focused light sources.
Enhancing Safety
Adequate lighting is essential for safety, especially at night. Properly placed lights can deter unwanted visitors and make your garden path safer for everyone.
- Motion Sensor Lights:Motion sensor lights are a great way to deter crime. They activate when they detect movement, illuminating the area and providing a deterrent. These lights are particularly effective for areas that are prone to crime or where you want to enhance security.
- Well-Lit Pathways:Ensure that your garden path is well-lit to prevent tripping hazards and accidents. Use lights that provide ample illumination without creating glare.
- Strategic Placement:Strategically place lights to illuminate areas that are prone to shadows or dark spots. This can deter potential intruders and create a safer environment.
Maintenance and Care: How To Light A Garden Path

Just like any other outdoor feature, your garden path lights need regular maintenance to ensure they function properly and remain aesthetically pleasing. This involves cleaning, protecting them from the elements, and troubleshooting any issues that may arise.
Cleaning and Protection
Maintaining the cleanliness of your garden path lights is crucial for their longevity and performance. Cleaning helps prevent dirt and debris from accumulating, which can obstruct light output and even damage the fixtures.
- Solar-powered lights:Solar panels require regular cleaning to ensure they can absorb maximum sunlight. Use a soft cloth and mild soap to wipe away dust, dirt, and bird droppings. Avoid using harsh chemicals or abrasive materials that could scratch the panels.
- Electric lights:Electric lights can be cleaned with a damp cloth. Be sure to disconnect the power source before cleaning to avoid electrical shock. For fixtures with glass or plastic covers, use a mild detergent and a soft cloth to remove any dirt or grime.
Protecting your lights from the elements is equally important. Harsh weather conditions like rain, snow, and extreme temperatures can damage the fixtures and shorten their lifespan.
- Weatherproof covers:Consider using weatherproof covers for your lights, especially during harsh weather conditions. These covers will help protect the fixtures from rain, snow, and wind. They are typically made of durable materials like plastic or metal.
- Proper installation:Ensure your lights are installed in a location that provides adequate protection from the elements. For example, if you are using solar-powered lights, position them in a spot that receives ample sunlight throughout the day.
Troubleshooting Common Lighting Problems
Over time, your garden path lights may experience some issues. It is important to know how to troubleshoot these problems to ensure they continue to function properly.
- Dim or flickering lights:If your lights are dim or flickering, the problem could be a faulty bulb, a loose connection, or a power outage. First, check the bulbs and replace any that are burnt out. Then, inspect the wiring and connections to ensure they are secure.
Finally, check your circuit breaker to see if it has tripped. If none of these solutions work, you may need to call an electrician.
- Lights not turning on:If your lights are not turning on at all, the problem could be a faulty bulb, a blown fuse, or a dead battery (for solar-powered lights). Check the bulbs and replace any that are burnt out. For electric lights, check the fuse box to see if the fuse has blown.
For solar-powered lights, ensure the solar panel is clean and receiving adequate sunlight. If the battery is dead, replace it with a new one.
Replacing Bulbs
Replacing bulbs is a simple task that you can do yourself. Before you begin, make sure to disconnect the power source to avoid electrical shock.
- Unscrew the old bulb:Gently unscrew the old bulb from the fixture. Be careful not to touch the bulb with your bare hands, as this can leave fingerprints that can interfere with the bulb’s performance.
- Insert the new bulb:Carefully insert the new bulb into the fixture. Make sure the bulb is properly seated and tighten it securely.
- Reconnect the power source:Once the new bulb is installed, reconnect the power source and test the light. If the light does not turn on, check the bulb to ensure it is properly seated and that the power source is working correctly.
Final Review
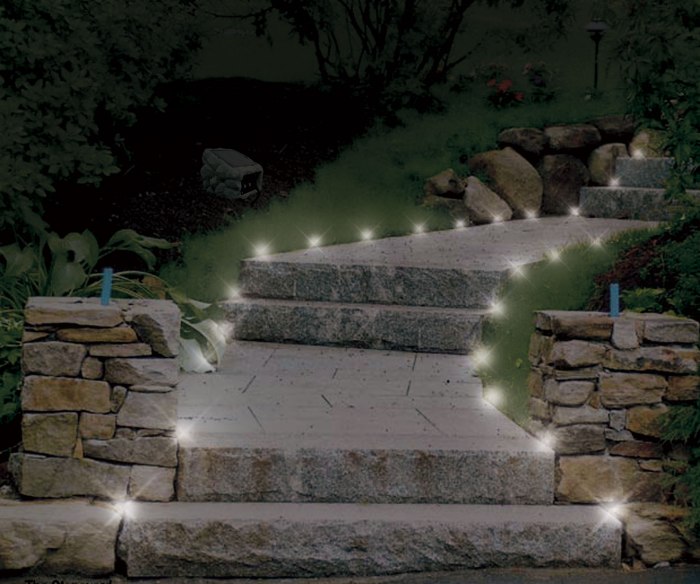
By following these steps, you can transform your garden path into a safe, inviting, and visually appealing feature. From choosing the right lights to planning a layout that enhances the beauty of your garden, this guide has provided a comprehensive approach to illuminating your outdoor space.
Remember, the key is to find a balance between practicality and aesthetics, creating an environment that is both functional and aesthetically pleasing. With a little planning and effort, you can create a garden path that is a source of pride and enjoyment for years to come.