How to harvest marigold seeds: a journey into the heart of a vibrant flower, where patience and precision unlock the secrets of seed saving. Marigolds, with their cheerful blooms and pungent scent, offer more than just beauty. They are a treasure trove of potential, ready to be unlocked with the right knowledge and techniques.
This guide will take you through the process of harvesting marigold seeds, from identifying ripe seed heads to drying, cleaning, and planting them for future blooms.
Marigold seeds, unlike many other flower seeds, are relatively easy to harvest and store. This makes them an ideal choice for gardeners of all experience levels who want to save money and grow their own vibrant blooms. Whether you are a seasoned gardener or just starting out, understanding the nuances of marigold seed harvesting can empower you to propagate your own marigold plants, ensuring a continuous supply of these cheerful flowers.
Identifying Marigold Seeds for Harvesting
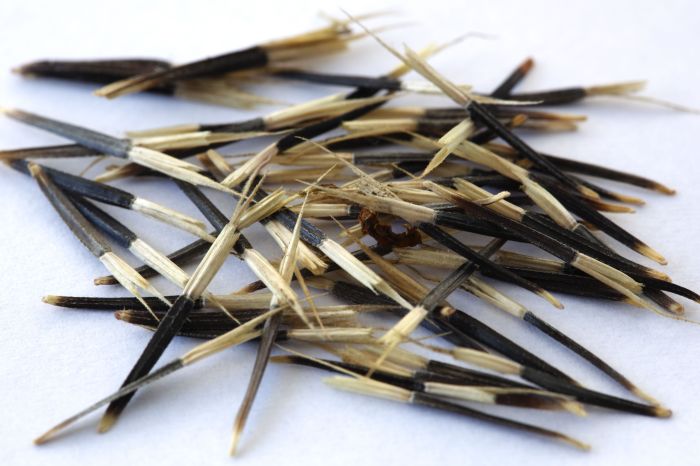
Knowing when to harvest marigold seeds is crucial to ensure they are ripe and viable for planting. Mature marigold seeds are ready for collection when the seed heads have fully dried and the petals have fallen off.
Characteristics of Mature Marigold Seeds
Once the marigold flowers have faded, the seed heads will begin to form. These seed heads will gradually dry out, changing color and texture. Here’s how to identify ripe marigold seeds:
- Color:Mature marigold seeds are typically black or dark brown. However, the color can vary depending on the marigold variety.
- Shape:Marigold seeds are small and have a slightly curved, elongated shape. They resemble tiny, dark grains.
- Size:The size of marigold seeds can also vary depending on the variety. They are generally small, ranging from about 1/16 to 1/8 inch in length.
Appearance of a Ready-to-Harvest Seed Head
A marigold seed head ready for harvesting will exhibit the following characteristics:
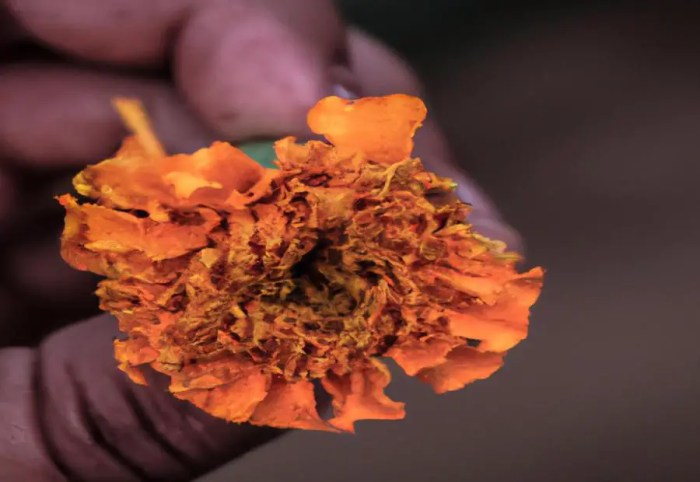
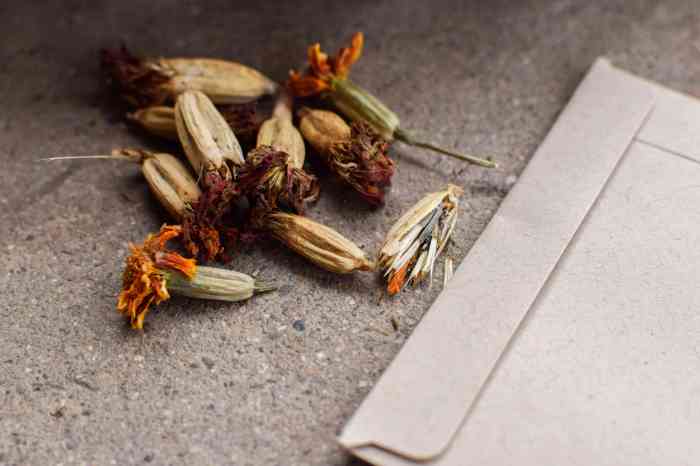
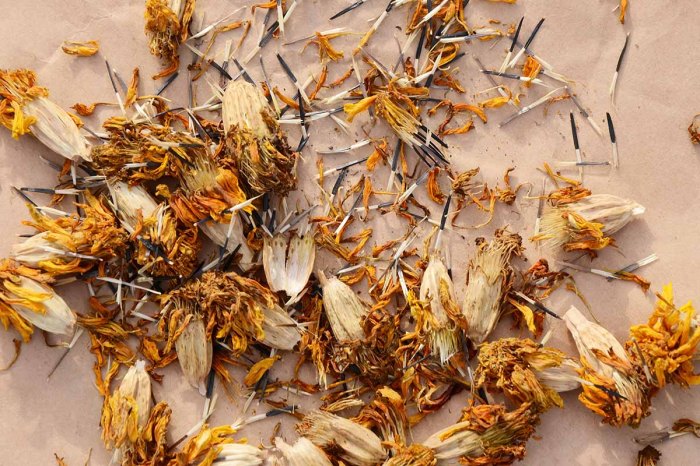
- Dry and Papery:The seed head will be dry and papery to the touch. The petals will have completely fallen off, leaving only the seed head itself.
- Brown or Dark Brown:The seed head will have turned a dark brown or brown color, indicating that the seeds inside are mature.
- Slightly Brittle:The seed head will be slightly brittle and may easily break apart when handled.
Distinguishing Ripe from Unripe Seeds
It is important to distinguish ripe marigold seeds from unripe ones. Unripe seeds will be softer, lighter in color, and may not germinate properly. Here’s how to tell the difference:
- Color:Ripe seeds are dark brown or black, while unripe seeds are often green or light brown.
- Texture:Ripe seeds are hard and dry, while unripe seeds are softer and more pliable.
- Seed Head:A ripe seed head will be dry and papery, while an unripe seed head will be green and fleshy.
Timing and Techniques for Harvesting Marigold Seeds
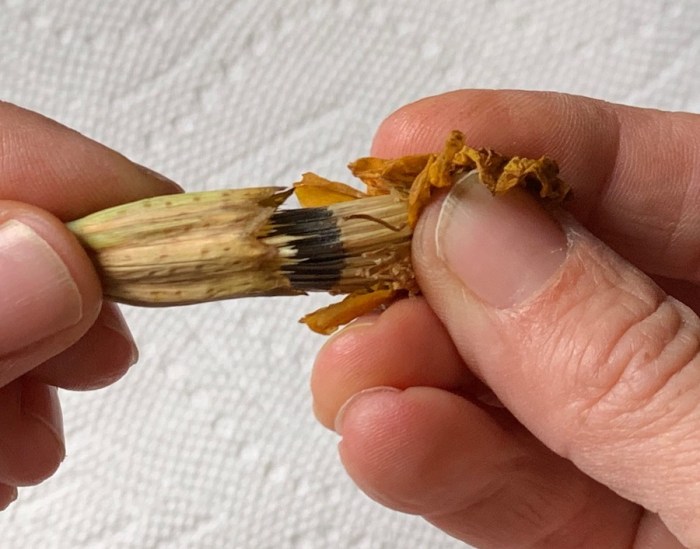
Harvesting marigold seeds at the right time is crucial for ensuring their viability and maximizing your harvest. Seed maturity and weather conditions play a significant role in determining the optimal time for harvesting.
Methods for Harvesting Marigold Seeds
The methods used for harvesting marigold seeds depend on the scale of your garden and your personal preference. Two common methods are hand-picking and using a seed head cutter.
- Hand-pickinginvolves carefully selecting mature seed heads and removing them from the plant. This method is ideal for small gardens or when you want to collect seeds from specific plants. It allows for greater control over the selection process and minimizes the risk of damaging the seed heads.
- Using a seed head cutteris a more efficient method for harvesting large quantities of seeds. This tool, often resembling a small pair of scissors, allows you to quickly and cleanly remove the seed heads from the plants. It is important to use a sharp and clean cutter to prevent crushing or damaging the seeds.
Gentle Handling for Seed Viability
Gentle handling is essential during the harvesting process to prevent seed damage and ensure their viability.
Marigold seeds are delicate and can easily be crushed or damaged.
- Avoid squeezing or crushing the seed heads during harvesting.
- Handle the seed heads with care and avoid dropping them.
- Use a gentle touch when removing the seeds from the seed heads.
Drying and Cleaning Marigold Seeds
Once you’ve harvested your marigold seed heads, the next step is to dry and clean them. This process ensures that the seeds are ready for storage and future planting.
Drying Marigold Seeds
Drying marigold seeds is essential for long-term storage and viability. It prevents mold and mildew growth, which can damage the seeds and reduce their germination rate.
- Air Drying: This is the simplest method. Spread the seed heads in a single layer on a screen, tray, or newspaper in a warm, dry, and well-ventilated location. Direct sunlight can be harsh, so consider a shaded area. Avoid humid environments.
- Oven Drying: If you need to dry the seeds quickly, you can use an oven. Set the oven to the lowest temperature setting (around 150-170°F) and leave the door slightly ajar to allow moisture to escape. Dry the seeds for about 2-3 hours, or until they are completely dry and brittle.
- Dehydrator: A food dehydrator is another option for drying marigold seeds. Follow the manufacturer’s instructions for drying time and temperature.
Cleaning Marigold Seeds
After drying, the next step is to clean the seeds. This removes debris, chaff, and other unwanted materials that can affect seed germination.
- Remove the Seeds: Gently rub the dried seed heads between your fingers or use a small sieve to separate the seeds from the chaff.
- Winnowing: This traditional method uses wind to separate the lighter chaff from the heavier seeds. Hold the seeds in a container and gently toss them in the air. The wind will carry away the chaff, leaving the seeds behind.
- Sieving: Use a fine-mesh sieve to separate the seeds from any remaining debris.
- Water Cleaning: For stubborn debris, you can use a bowl of water. Place the seeds in the water and stir gently. The seeds will sink to the bottom, while the debris will float to the surface. Remove the debris and allow the seeds to dry completely.
Harvesting marigold seeds is a simple process that can be done in your own backyard. Once the flower heads have dried and turned brown, carefully remove them from the plant and place them in a paper bag. Allow the seeds to dry completely, then gently rub them between your fingers to release them from the seed pods.
These seeds can then be stored in a cool, dry place for planting next season.
Storing Marigold Seeds
Once the seeds are clean and dry, store them properly to maintain their viability.
- Airtight Containers: Store the seeds in airtight containers, such as glass jars or plastic bags. This prevents moisture and pests from damaging the seeds.
- Cool, Dry Location: Store the containers in a cool, dry location, such as a refrigerator or a cool, dark cupboard.
- Labeling: Label the containers with the variety of marigold, the date of harvest, and any other relevant information.
Planting Marigold Seeds: How To Harvest Marigold Seeds
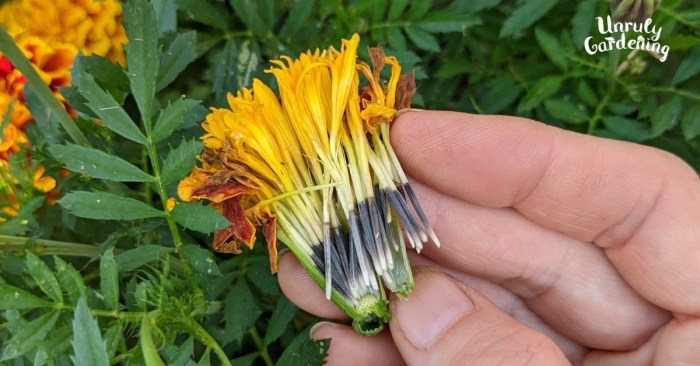
Planting marigold seeds is a straightforward process that can be done in spring or fall, depending on your climate. With proper timing, planting depth, and spacing, you can ensure healthy marigold seedlings that will thrive in your garden.
Optimal Planting Times
The ideal planting time for marigold seeds varies depending on your climate. Here’s a table outlining the recommended planting times for different regions:
| Climate | Planting Time |
|---|---|
| Warm Climates (USDA Zones 8-10) | Fall (September-October) or Spring (March-April) |
| Moderate Climates (USDA Zones 5-7) | Spring (April-May) or Fall (September-October) |
| Cool Climates (USDA Zones 3-4) | Spring (May-June) |
Planting Depth and Spacing
The recommended planting depth and spacing for marigold seeds depend on the growing medium you are using.
- Direct Sowing in the Garden:Sow marigold seeds 1/4 inch deep and space them 6-12 inches apart.
- Starting Seeds Indoors:Fill seed trays or pots with seed-starting mix and sow seeds 1/4 inch deep. Space seeds 1-2 inches apart.
Step-by-Step Guide to Planting Marigold Seeds
- Prepare the Soil:Choose a sunny location in your garden and prepare the soil by loosening it with a garden fork or tiller. Amend the soil with compost or aged manure for optimal drainage and nutrient content.
- Sow the Seeds:Make shallow furrows in the soil about 1/4 inch deep. Sprinkle the marigold seeds along the furrows and cover them lightly with soil.
- Water Gently:Water the seeds thoroughly after planting, ensuring the soil is moist but not waterlogged.
- Thin the Seedlings:Once the seedlings emerge, thin them to the desired spacing. Leave the strongest seedlings and remove any weaker ones.
- Provide Adequate Sunlight:Marigolds require at least 6 hours of direct sunlight daily. Ensure the planting location receives sufficient sunlight.
- Water Regularly:Keep the soil consistently moist, especially during dry periods. Water deeply and less frequently, allowing the top inch of soil to dry out between waterings.
- Fertilize:You can fertilize your marigolds with a balanced liquid fertilizer every 2-3 weeks. However, marigolds are relatively low-maintenance plants and may not require frequent fertilization.
Marigold Seed Saving Tips
Saving marigold seeds is a rewarding way to enjoy these vibrant flowers year after year. While it’s a relatively simple process, there are a few key tips to ensure successful seed saving and maintain the desired variety of your marigolds.
Common Challenges and Solutions, How to harvest marigold seeds
Saving marigold seeds can present a few challenges, but with some knowledge and planning, you can overcome them. Here are some common challenges and their solutions:
- Poor Seed Quality:Seeds that are not fully mature or have been damaged by pests or diseases will not germinate well. To ensure high-quality seeds, harvest them when they are fully mature and dry, and store them in a cool, dry place.
- Cross-Pollination:Marigolds are self-pollinating, but they can cross-pollinate with other marigold varieties. To prevent cross-pollination, isolate different marigold varieties by at least 100 feet, or grow only one variety at a time.
- Seed Loss:Seeds can be lost due to wind, rain, or birds. To minimize seed loss, cover the flower heads with cheesecloth or a fine mesh bag after the petals have fallen off.
Preventing Cross-Pollination
Cross-pollination occurs when pollen from one marigold variety is transferred to another, resulting in hybrid offspring. This can alter the desired characteristics of your marigold variety, such as flower color, size, or shape.
- Grow One Variety at a Time:The easiest way to prevent cross-pollination is to grow only one variety of marigolds at a time. This ensures that pollen from different varieties cannot mix.
- Isolate Different Varieties:If you must grow multiple varieties, ensure they are physically separated by at least 100 feet. This distance helps minimize the chances of pollen transfer by wind or insects.
- Hand-Pollination:For specific breeding purposes, you can hand-pollinate marigolds to control the cross-pollination process. This involves carefully transferring pollen from one flower to another.
Labeling and Storing Marigold Seeds
Proper labeling and storage are crucial for preserving the viability and purity of your marigold seeds.
- Labeling:Label each seed packet with the variety name, date of harvest, and any other relevant information. This ensures you can easily identify and use your seeds in the future.
- Storage:Store marigold seeds in a cool, dry, and dark place. This helps maintain their viability for several years. Paper envelopes or airtight containers are suitable for storing seeds.
End of Discussion
Harvesting marigold seeds is a rewarding experience, allowing you to connect with the life cycle of these vibrant flowers and contribute to their propagation. By following the steps Artikeld in this guide, you can ensure that your marigold seeds are harvested, dried, and stored properly, guaranteeing a successful harvest of new marigold plants in the future.
Remember, patience and gentle handling are key to successful seed saving, and the rewards of a bountiful marigold garden are well worth the effort.