Root rot in orchids and treatment is a common problem that can affect the health and growth of these beautiful plants. Orchids are known for their delicate root systems, which are susceptible to damage from overwatering, poor drainage, and fungal infections.
Root rot can lead to a range of symptoms, including discoloration, mushy texture, and foul odor. If left untreated, root rot can eventually kill the orchid. This guide provides a comprehensive overview of root rot in orchids, including its causes, symptoms, diagnosis, treatment, and prevention.
Understanding the causes of root rot is crucial for effective prevention and treatment. Overwatering is a major culprit, as it creates an environment where fungi thrive. Poor drainage can also contribute to root rot by allowing water to sit around the roots.
Additionally, fungal infections can attack weakened roots, especially in humid environments. Recognizing the symptoms of root rot is essential for early intervention. Discoloration, mushy texture, and foul odor are all telltale signs. It’s important to inspect the roots regularly for any signs of rot, as early detection can significantly improve the chances of successful treatment.
Understanding Root Rot in Orchids
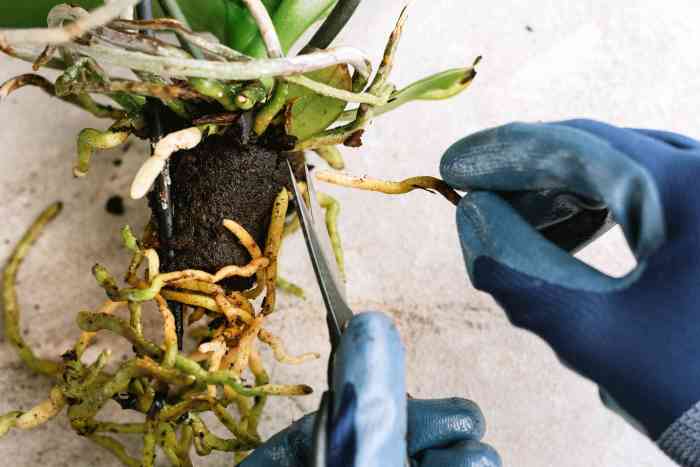
Root rot is a common problem that can affect orchids, leading to stunted growth, wilting, and even death. Understanding the causes, symptoms, and impact of root rot is crucial for orchid owners to prevent and treat this condition effectively.
Causes of Root Rot
Root rot in orchids is primarily caused by excessive moisture and poor drainage. When the orchid’s roots are constantly wet, they become susceptible to fungal and bacterial infections that can damage and destroy the root tissue.
- Overwatering: Orchids are epiphytes, meaning they grow on other plants and obtain moisture from the air. They do not require constant watering like terrestrial plants. Overwatering is the most common cause of root rot, as it creates a moist environment that favors fungal and bacterial growth.
- Poor Drainage: Orchids need well-draining potting mix to allow excess water to escape. If the potting mix is too dense or the pot does not have adequate drainage holes, water can accumulate around the roots, leading to root rot.
- Fungal Infections: Various fungi, such as Pythium and Phytophthora, can infect orchid roots, causing them to rot. These fungi thrive in moist environments and can easily spread through contaminated water or potting mix.
Symptoms of Root Rot
Recognizing the symptoms of root rot is essential for early intervention and treatment. The following signs indicate that your orchid may be suffering from root rot:
- Discoloration: Healthy orchid roots are typically white or light green. If the roots are brown, black, or mushy, it could be a sign of root rot.
- Mushy Texture: When you gently squeeze a healthy orchid root, it should feel firm. If the roots are soft, mushy, or easily break apart, it indicates root rot.
- Foul Odor: Rotting roots often emit a foul odor due to the presence of bacteria and fungi. If you notice a pungent smell coming from the potting mix, it could be a sign of root rot.
- Wilting: Even if you water your orchid regularly, wilting leaves can be a symptom of root rot. The damaged roots are unable to absorb water efficiently, leading to dehydration.
- Leaf Drop: Orchids may drop leaves as a response to stress caused by root rot.
Impact of Root Rot on Orchid Health and Growth
Root rot can have a devastating impact on the health and growth of orchids. Damaged roots are unable to absorb water and nutrients, leading to:
- Stunted Growth: Orchids with root rot may exhibit slow growth or fail to produce new leaves or flowers.
- Wilting and Leaf Drop: The orchid may wilt and drop leaves due to dehydration.
- Reduced Flowering: Root rot can weaken the orchid, reducing its ability to produce flowers.
- Death: In severe cases, root rot can lead to the death of the orchid.
Diagnosing Root Rot
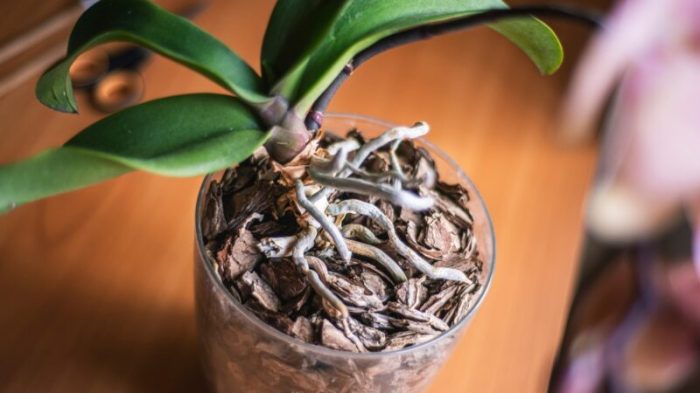
Early detection is crucial for successfully treating root rot. Regularly inspecting your orchid’s roots can help you identify the problem before it becomes severe.
Inspecting Orchid Roots
It is essential to examine your orchid’s roots for signs of root rot to determine the severity of the issue and implement appropriate treatment measures. This process involves carefully inspecting the roots for any abnormalities, discoloration, and texture changes.
- Remove the orchid from its pot.Gently loosen the potting mix and carefully lift the plant to avoid damaging the roots.
- Examine the roots for discoloration.Healthy orchid roots are typically firm, white, or light green. Look for any roots that are brown, black, mushy, or slimy. These are signs of root rot.
- Feel the roots for texture.Healthy roots are firm and resilient. Roots that are soft, mushy, or easily break apart are likely rotting.
- Check for root tips.Healthy orchid roots have firm, white, or light green tips. Rotting roots often have brown or black tips.
Distinguishing Healthy Roots from Rotted Roots
Differentiating healthy roots from those affected by rot is critical for accurate diagnosis and treatment. Healthy roots possess specific characteristics that set them apart from rotted ones. Healthy roots are typically firm, resilient, and have a vibrant color, while rotted roots exhibit signs of decay, such as discoloration, softness, and a mushy texture.
Root rot in orchids is a common problem, often caused by overwatering or poor drainage. Treating root rot involves removing affected roots and repotting the orchid in fresh, well-draining soil. The presence of mushrooms in your yard, as explained in this article why are mushrooms growing in my yard , is a sign of a healthy, thriving ecosystem, but it can also indicate excessive moisture in the soil, which could be contributing to the orchid’s root rot problem.
To prevent root rot, it’s essential to ensure your orchid has adequate drainage and avoid overwatering.
- Healthy roots:Firm, resilient, white or light green, and have healthy root tips.
- Rotted roots:Soft, mushy, brown or black, and often have brown or black tips.
Determining the Severity of Root Rot
The extent of root rot can vary significantly, influencing the treatment plan and chances of recovery. Assessing the severity involves evaluating the percentage of roots affected by rot and the overall health of the plant.
- Mild root rot:Only a few roots are affected. The orchid may still be healthy and able to recover.
- Moderate root rot:A significant portion of the roots are affected. The orchid may be weakened but still able to recover.
- Severe root rot:Most or all of the roots are affected. The orchid is likely very weakened and may not be able to recover.
Treatment Options
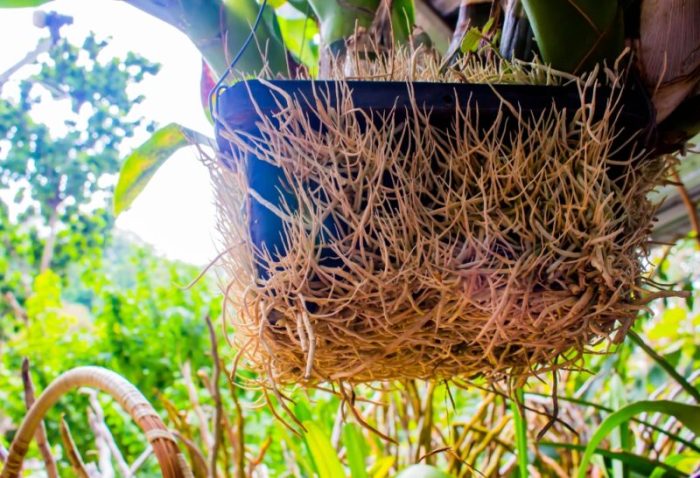
Root rot in orchids can be treated effectively if caught early. Several treatment methods are available, each with its own advantages and disadvantages. This section explores the most common approaches to treating root rot, providing a comprehensive understanding of their application and effectiveness.
Repotting
Repotting is a crucial step in treating root rot. It involves removing the orchid from its infected pot and replacing the contaminated potting mix with fresh, well-draining material. Repotting provides a clean environment for the orchid to recover and encourages the development of healthy roots.
Steps Involved in Repotting an Orchid with Root Rot
Repotting an orchid with root rot requires careful execution to ensure successful recovery. Here are the steps involved:
- Remove the orchid from its pot.Gently tap the base of the pot to loosen the orchid, and carefully pull it out, taking care not to damage the roots or leaves.
- Inspect the roots.Examine the roots for signs of rot, such as mushy, brown, or black roots. Remove any severely damaged or rotted roots with a sharp, sterilized tool.
- Select the appropriate potting mix.Orchids require a well-draining potting mix that allows for proper aeration and moisture retention. A suitable mix may include bark chips, coconut husk chips, or a blend of both.
- Choose the right container.The pot should be well-ventilated and have drainage holes to prevent waterlogging. Terracotta pots are a good choice as they allow for better air circulation and moisture evaporation.
- Repot the orchid.Place a layer of fresh potting mix in the bottom of the pot. Gently place the orchid in the pot, ensuring the roots are spread out evenly. Add more potting mix around the roots, leaving the crown exposed.
- Water the orchid.Water the orchid thoroughly after repotting, allowing excess water to drain out. Avoid overwatering, as this can lead to further root rot.
Pruning
Pruning involves removing the rotted roots from the orchid. This practice helps to prevent the spread of rot and promotes the growth of healthy roots.
Steps Involved in Pruning Rotted Roots
- Sterilize tools.Before pruning, sterilize your tools to prevent the introduction of new pathogens. You can sterilize tools by soaking them in a solution of bleach and water (1:10 ratio) for 10 minutes, followed by rinsing thoroughly with clean water.
- Inspect the roots.Carefully examine the roots and identify any that are mushy, brown, or black. These are signs of root rot.
- Prune the rotted roots.Using a sharp, sterilized tool, cut away the rotted roots as close to the healthy tissue as possible.
- Treat the wounds.After pruning, you can apply a fungicide to the wounds to prevent further infection. Allow the wounds to dry completely before repotting the orchid.
Fungicides
Fungicides are chemical solutions that can help control fungal infections that cause root rot. They work by killing the fungi or inhibiting their growth.
Comparison of Different Treatment Methods for Root Rot
| Treatment Method | Advantages | Disadvantages |
|---|---|---|
| Repotting | Provides a clean environment for the orchid to recover.Encourages the development of healthy roots. | Can be stressful for the orchid.May not be effective if the rot is severe. |
| Pruning | Removes infected tissue and prevents the spread of rot.Promotes the growth of healthy roots. | Can be stressful for the orchid.May not be effective if the rot is severe. |
| Fungicides | Can effectively kill or inhibit the growth of fungi.Can be used as a preventative measure. | Can be harmful to the orchid if used incorrectly.May not be effective against all types of fungi. |
Prevention Strategies: Root Rot In Orchids And Treatment
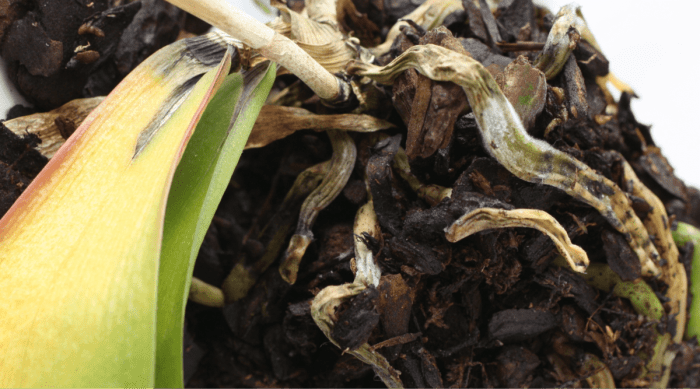
Preventing root rot in orchids is crucial for their long-term health and vitality. By implementing preventative measures, you can significantly reduce the risk of this common problem and enjoy vibrant, flourishing orchids for years to come.
Choosing the Right Orchid Species and Growing Conditions
Selecting an orchid species that suits your environment and growing conditions is essential for its well-being. Different orchid species have varying needs regarding light, humidity, and temperature. Research the specific requirements of your chosen orchid and ensure your home provides a suitable environment.
Using Well-Draining Potting Mix
Orchids thrive in a well-draining potting mix that allows excess water to escape quickly. This prevents the roots from sitting in water, which can lead to root rot. A suitable potting mix typically consists of a blend of bark, charcoal, and perlite.
Avoid using potting mixes designed for other plants, as they may retain too much moisture.
- Bark:Provides structure and aeration for the roots. Choose a bark size appropriate for your orchid’s root system.
- Charcoal:Improves drainage and helps to prevent fungal growth.
- Perlite:Adds air pockets to the mix, enhancing drainage and aeration.
Watering Properly
Proper watering is crucial for orchid health and root rot prevention. Orchids are epiphytes, meaning they grow on other plants and obtain moisture from the air. Overwatering is a primary cause of root rot.
- Allow the potting mix to dry out slightly between waterings.
- Water thoroughly when the mix is dry, ensuring the water drains freely from the pot.
- Avoid letting water sit in the pot’s base, as this can lead to root rot.
Ensuring Good Air Circulation
Adequate air circulation around your orchid is essential for preventing root rot. Stagnant air can trap moisture, creating a favorable environment for fungal growth. Ensure your orchid is not crowded by other plants and that there is sufficient airflow around it.
Root rot in orchids is a common problem, often caused by overwatering or poor drainage. If you notice your orchid’s leaves turning yellow and wilting, it could be a sign of root rot. It’s important to check the roots for signs of damage and take steps to address the issue.
Similar symptoms can occur in bean plants, and you can learn more about why your bean plants might be turning yellow by reading this helpful article: why are my bean plants turning yellow. Once you’ve identified the cause of your orchid’s root rot, you can take steps to treat it, such as repotting the plant in fresh, well-draining soil and adjusting your watering schedule.
- Place your orchid in a well-ventilated area.
- Avoid overcrowding the plant with other plants.
- Consider using a fan to promote air circulation.
Monitoring Orchids for Early Signs of Root Rot
Regularly inspecting your orchids for early signs of root rot can help prevent the problem from escalating. Early detection allows for timely intervention and increases the chances of saving your plant.
- Check the potting mix for excessive moisture or mold growth.
- Examine the roots for signs of discoloration, mushiness, or blackening.
- Monitor the leaves for signs of wilting, yellowing, or brown spots, which may indicate root rot.
Orchid Care After Treatment
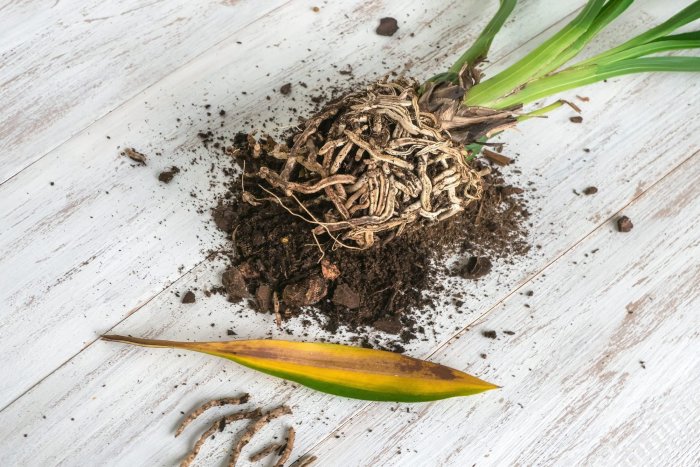
Successfully treating root rot is a significant step in restoring your orchid’s health. However, the journey to full recovery requires careful attention and consistent care. This section Artikels essential post-treatment practices to ensure your orchid thrives and avoids future infections.
Watering Frequency
The frequency of watering after root rot treatment is crucial. Overwatering can lead to a recurrence of the infection, while underwatering can hinder the plant’s recovery. The goal is to strike a balance that provides sufficient moisture without creating a waterlogged environment.
- Assess the potting mix:The potting mix should be allowed to dry out between waterings. Check the mix by touching it with your finger. If it feels dry to the touch, it’s time to water.
- Observe the orchid’s leaves:Healthy orchid leaves will be firm and plump. If the leaves start to wrinkle or become soft, it’s a sign of underwatering.
- Adjust watering based on environmental factors:Temperature, humidity, and light levels all influence how quickly the potting mix dries. In warm, humid environments, you may need to water more frequently than in cooler, drier conditions.
Humidity Levels, Root rot in orchids and treatment
Orchids thrive in humid environments. Maintaining adequate humidity is crucial for their recovery, especially after root rot treatment.
- Group orchids together:Placing orchids near each other creates a microclimate with increased humidity.
- Use a humidifier:A humidifier can be used to increase the humidity around your orchids, especially during dry periods.
- Place orchids on a pebble tray:Fill a tray with pebbles and add water to the bottom, ensuring the water level does not touch the pots. The water will evaporate, increasing humidity around the plants.
Light Requirements
Orchids need adequate light for photosynthesis, which is essential for their recovery. However, too much direct sunlight can scorch their leaves.
- Provide bright, indirect light:Orchids thrive in bright, indirect light. Avoid placing them in direct sunlight, especially during the hottest part of the day.
- Observe for signs of stress:If the leaves start to turn yellow or brown, it’s a sign of too much light. Move the orchid to a shadier location.
Observing Recovery
Closely observing your orchid’s recovery is essential. This involves monitoring its growth, the appearance of its leaves, and the development of new roots.
- New growth:Healthy orchids will produce new growth, including new leaves and roots.
- Leaf color and texture:Healthy orchid leaves will be firm, plump, and have a vibrant green color.
- Root development:Observe the development of new roots. New roots will be white and firm.
Adjusting Care Practices
As your orchid recovers, you may need to adjust your care practices to meet its changing needs. This may involve:
- Increasing watering frequency:As the orchid develops a healthy root system, it will require more frequent watering.
- Increasing light exposure:As the orchid recovers, you may gradually increase its light exposure.
- Fertilizing:Once the orchid has developed new roots, you can start fertilizing it to promote growth.
Preventing Future Root Rot Infections
Preventing future root rot infections is crucial for maintaining the health of your orchids. Here are some tips to help prevent root rot:
- Use a well-draining potting mix:A well-draining potting mix allows excess water to drain away, reducing the risk of root rot.
- Avoid overwatering:Allow the potting mix to dry out between waterings.
- Ensure good air circulation:Good air circulation helps to prevent the build-up of humidity around the roots.
- Use sterilized pots and tools:Sterilize pots and tools before using them to prevent the spread of pathogens.
Outcome Summary
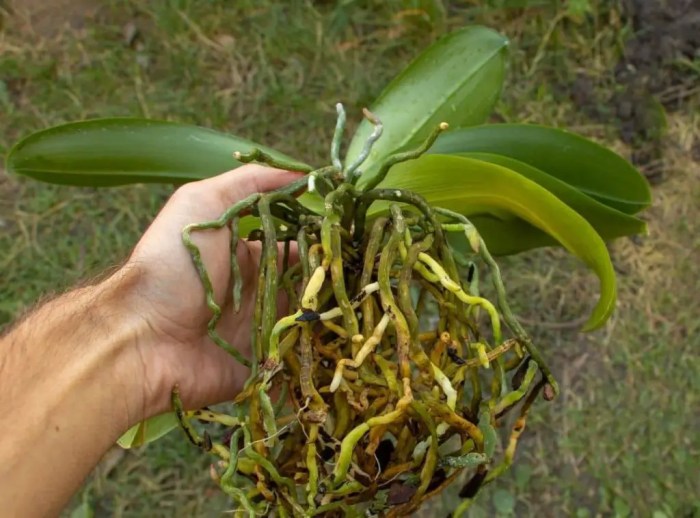
Successfully treating and preventing root rot in orchids requires a combination of proper care practices and timely intervention. By understanding the causes and symptoms of root rot, you can take proactive steps to protect your orchids from this debilitating condition.
Regular inspection, proper watering techniques, and a well-draining potting mix are essential for maintaining the health of your orchids. If root rot does occur, prompt treatment with repotting, pruning, and fungicides can help to save your beloved plants. Remember, a little knowledge and preventative care can go a long way in ensuring the vibrant health and beauty of your orchid collection.